Jupyter Notebooks and Flyte: Enabling Reproducible and Scalable AI Pipelines

Introduction
The Jupyter Notebook is one of the most adopted tools in the ML ecosystem, with a lasting impact on the way both experienced and new data, ML, and AI professionals learn to develop and run Python scripts. But despite their popularity, Notebooks cannot guarantee the reproducibility that scalable AI pipelines require in production.
In this blog, we explore how Flyte can act as the reproducible and scalable compute engine that turns experiments into products.
Notebook-driven development: advantages and challenges
Jupyter Notebooks are great for writing well-documented code, giving the possibility of interleaving Markdown with Python code. They’re also great for iterative experimentation because the feedback loop is short: the output is right below the program that produces it. Finally, Notebooks are helpful when you need to visualize data (like in Exploratory Data Analysis), letting you generate plots easily.
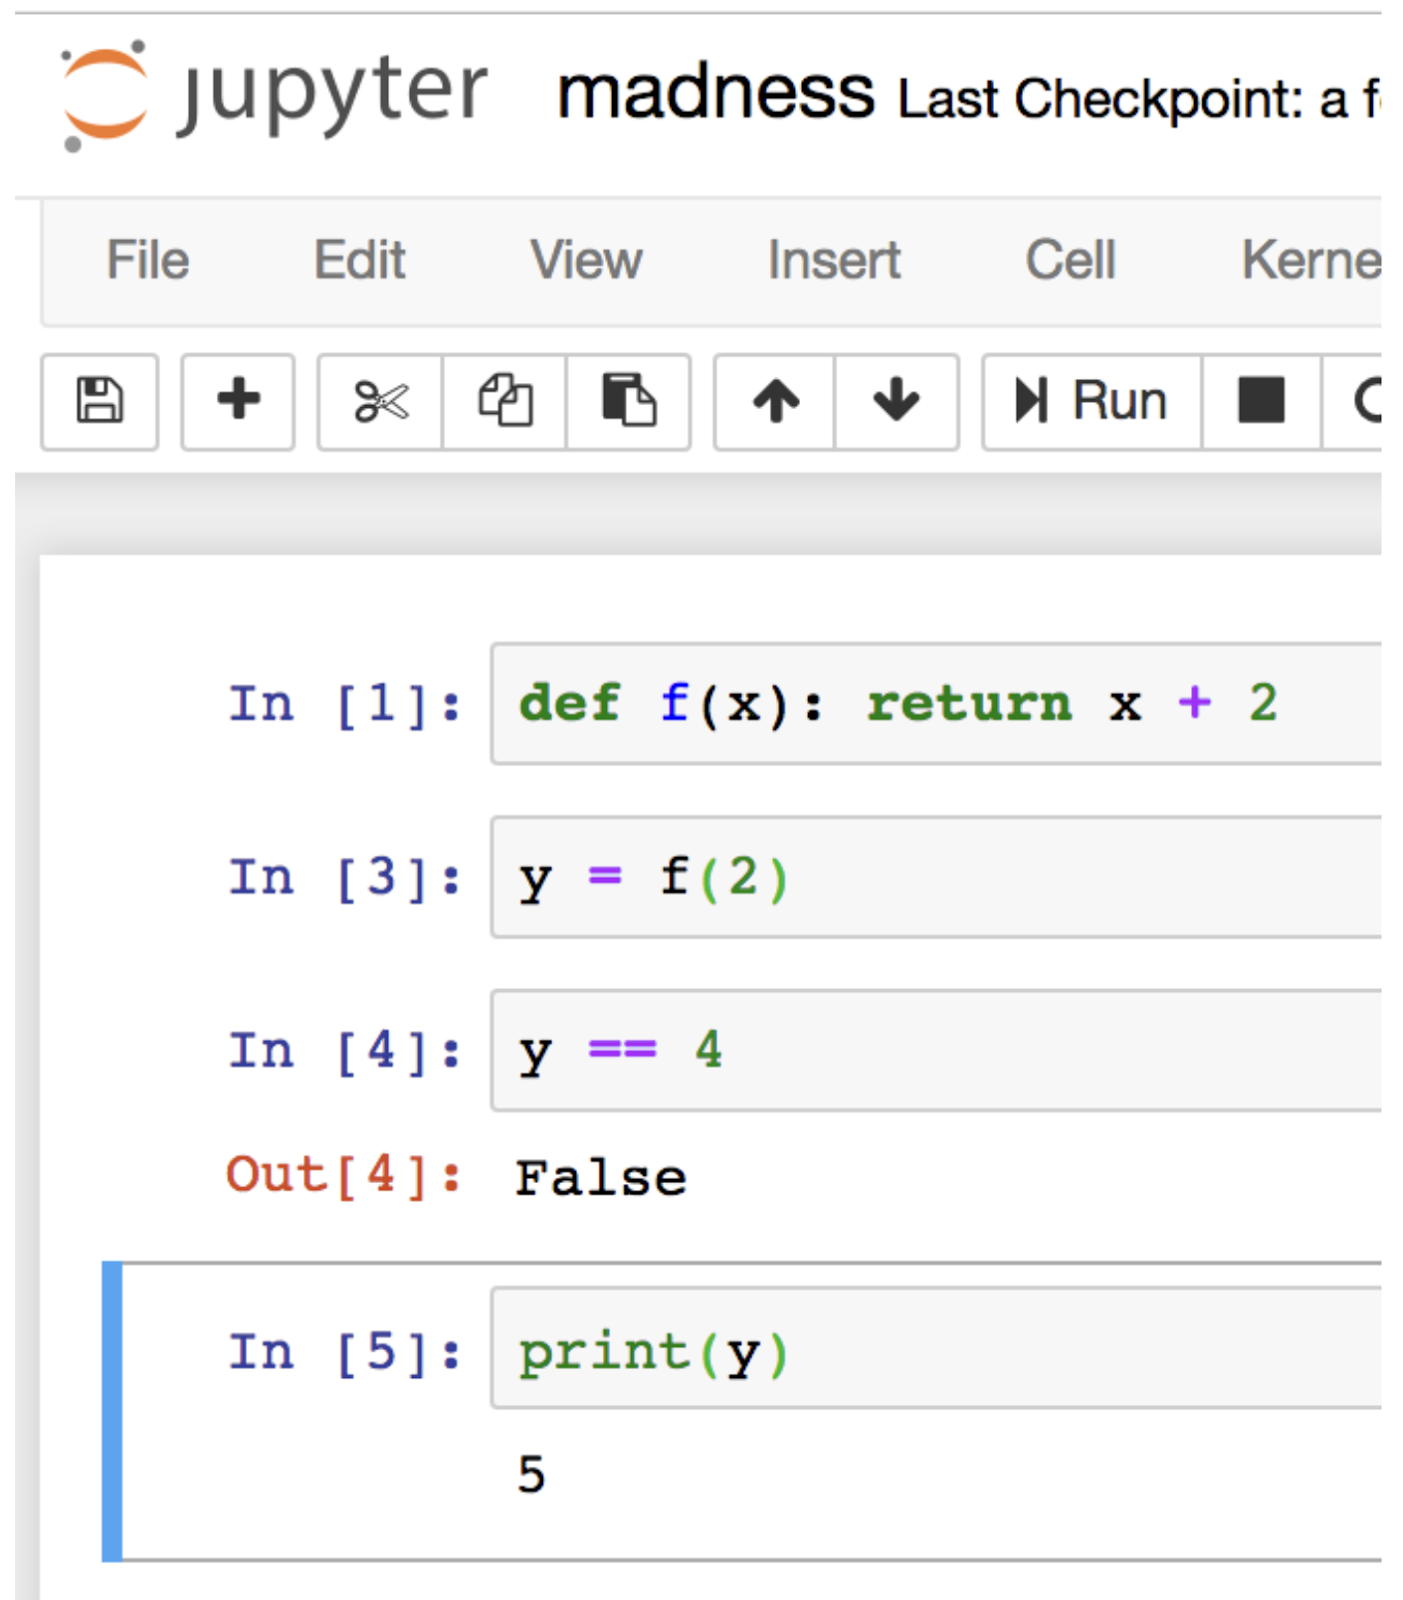
However, it’s very hard to write production software without maintaining state in some way. With Notebooks, while the iPython kernel keeps track of execution state, it doesn’t preserve references to the source code and also, most importantly, it doesn’t make the state evident to the user. It could be very hard, or impossible to determine from a simple inspection of a notebook, what the true state of a variable is:

Also, writing modular code is one of the main contributing factors to enable reproducible experimentation. This is, separating your model code from the infrastructure requirements to ensure a reliable execution context that guarantees consistent dependencies, versions, and libraries regardless of the environment where the code runs. This is not something that Notebooks provide directly. A common pattern is relying on a `requirements.txt` file to declare dependencies. More advanced use cases will build container images that carry the environment configuration.
Building a production-quality model pipeline from the comfort of your Jupyter Notebook
To follow the example notebook used in this section, make sure you’re using `flytekit >= 1.14`
The first thing the notebook guides you to do is to declare where your Flyte configuration file is.
With this integration, you can run Notebook cells to any known Flyte deployment form factor: sandbox, on-prem, self-hosted on AWS/GCP/Azure, or even Union’s BYOC/Serverless hosted services.
Before writing any model code, an ImageSpec object is declared:
Let’s unpack what’s happening here.
`ImageSpec` is a class you can use to declaratively build an OCI-compliant container image without writing the entire spec in a Dockerfile. Just like in the example above, you only need to provide the expected packages and versions your image should use, and it will trigger ImageSpec to build an image and store it in a container registry you have `push` access to. For convenience, the sandbox Flyte instance comes with a Docker registry.
This approach helps you turn infrastructure requirements into a declarative statement that captures details of the environment where the model was developed, enabling reliable execution regardless of changes between stages until production.
In this line, we define that every instance of the `task` method of `flytekit`, will use the `container_image` we just declared. You can always customize this at the task or workflow level, but for the scope of this example, we’re using the same image for all tasks.
As we’re working with the classic Palmer Penguins dataset, we define a set of features and the target for model predictions:
Notice how the function inside `@task` uses Type hints. Flyte enforces it to ensure type safety as the data moves throughout the steps in an ML pipeline. Learn more about how Flyte’s type system works.
Then, we finally “connect” the Notebook with a Flyte instance:
A couple of things happened here.
The `for_sandbox()` method automatically captured the configuration for a sandbox instance into the `Config` object, saving you time from having to find or edit config files. Also, it sets the default projects and domains to simplify the process of triggering and fetching executions. You can use different defaults or override them at the launchplan level.
Also, we triggered an execution on Flyte by invoking the `execute` method of the `remote` object, specifying the task to run, the inputs (in this case not required), and the condition for the cell to wait until the execution in Flyte is done.
Once the execution is done, the magic becomes more evident because Flyte takes you from Notebook’s hidden states to execution artifacts, including inputs and outputs, stored in durable storage (an S3-compliant bucket in this example):
From this point on, we can start referencing the outputs by their index, and use them in the Notebook to do anything from basic EDA:

To train a Linear Regression model and calculate its accuracy score:
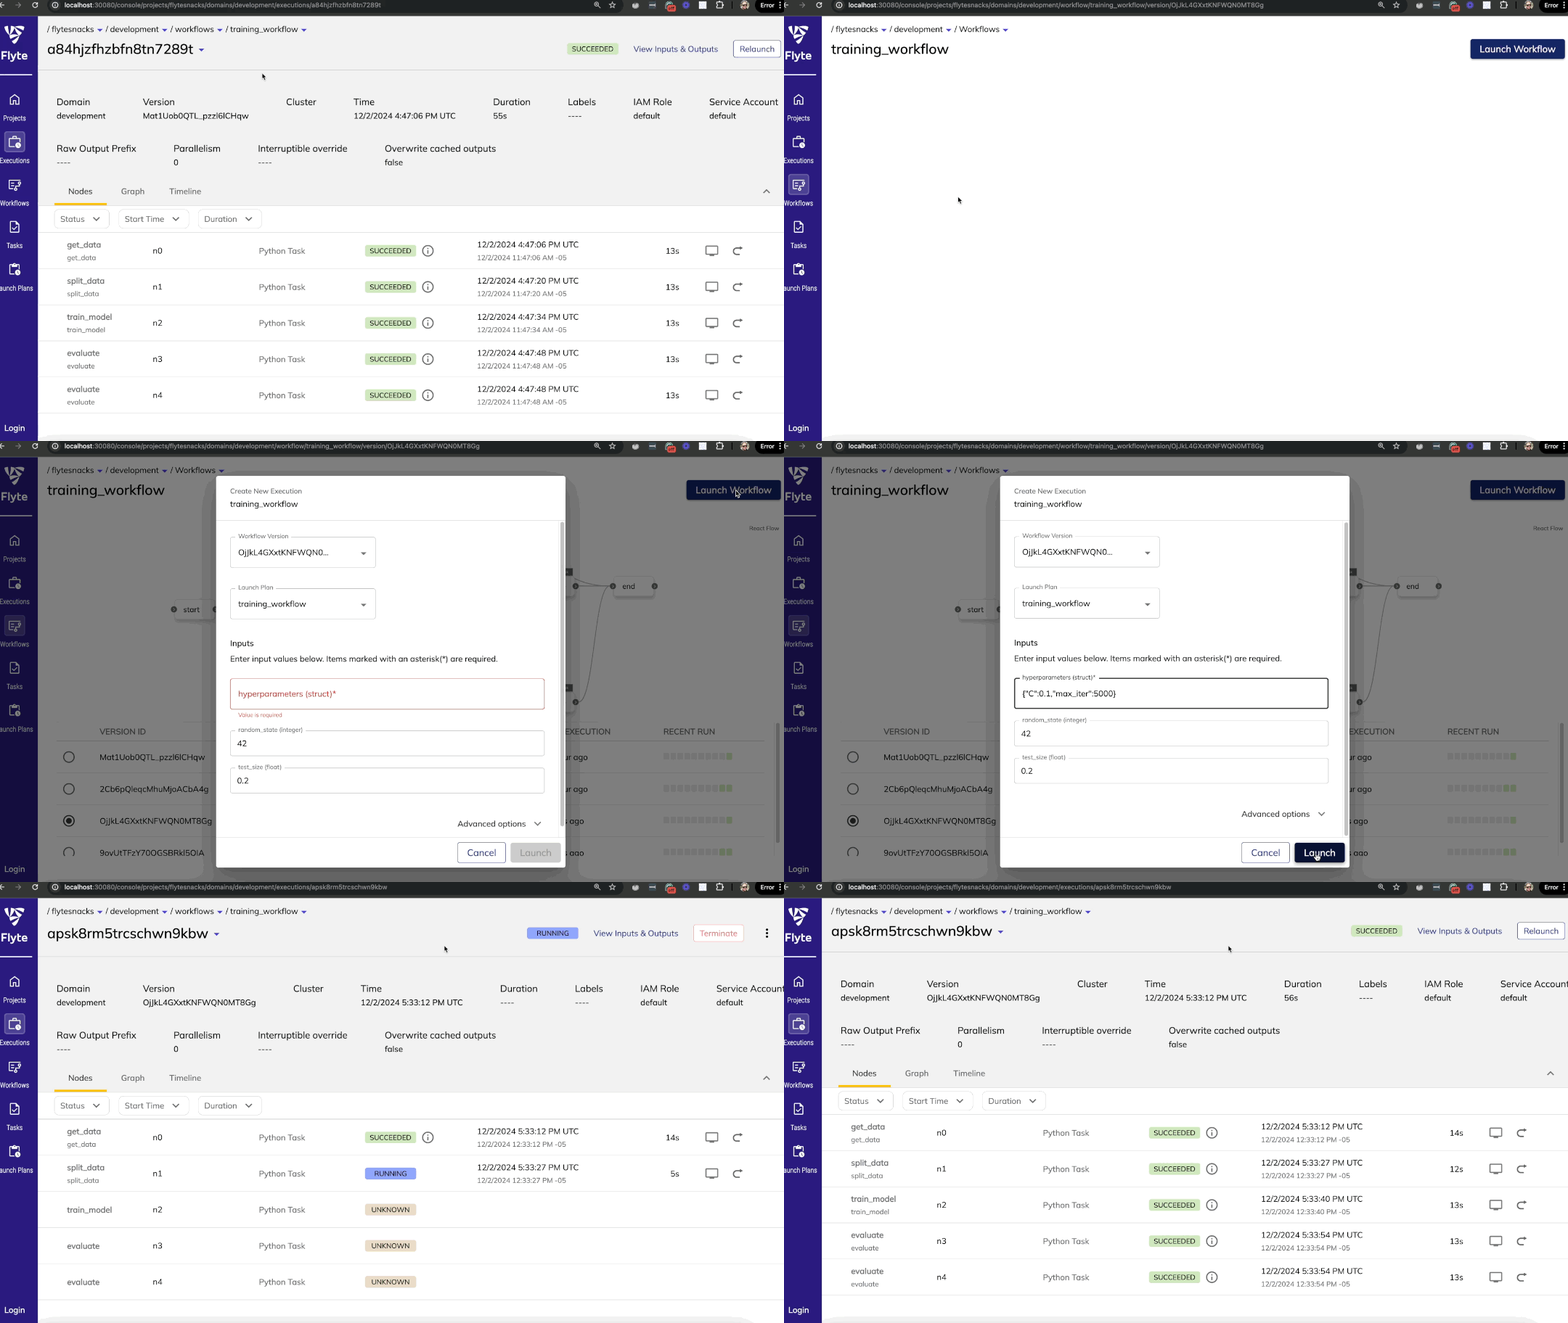
Every time you make a change to any part of your model code, Flyte will register it as a new workflow version, allowing you to reproduce the results of previous iterations and adjust your experiments quickly:

Conclusion
Jupyter Notebooks are an essential component of the toolkit for the large majority of data scientists and ML engineers when it comes to exploring a dataset and interacting with it for experimentation. Moving code developed in Notebooks to a production-grade application is not a straightforward process, and usually requires interacting with multiple external systems while dealing with Notebook’s hidden states and unreliable execution order. Flyte can help bridge the gap between Notebooks and the fast and reproducible experimentation that modern ML systems require.
Experiencing the power of a robust and reproducible compute engine is one install away:
If you want to get access to GPUs and a massively scalable platform powered by Flyte, sign up for Serverless.
Questions? We’d love to hear from you at the Flyte Slack community


